In order to create our avatars, several steps have been conducted:
Step 1: Photo Scanning
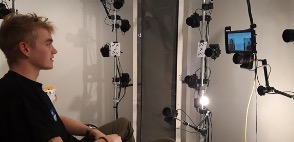
At first, we perform a photo scan of the client that is to be digitized. We capture all kinds of facial expressions of this client in order to make it possible to animate the digital imprint of the client later on.
Programs: Photogramrammetry Rig & Agisoft
Step 2: 3D Models
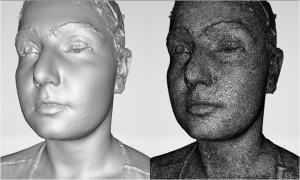
After taking several photographs, we use Photogrammetry to convert them into 3D models. During this process, we use approximately 15 million data triangles to get the best result.
Program used: Agisoft
Step 3: Cleaning the Base
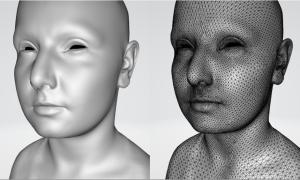
In this step, the 3D model created is morphed into the target face. The base template consists of a clean topology, UVs, and mouth cavity. It is called the base since it will be used for the creation of expressions and textures in the following steps.
Program used: Autodesk Maya
Step 4: Textures
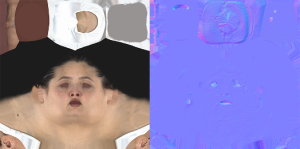
Textures are applied to the surface of the 3D model to give it a more realistic appearance. This can be done by selecting the appropriate texture images and applying them to the model. Examples of textures are skin color, and details such as pores, wrinkles, and sweat.
Programs used: Substance Painter, Adobe Photoshop, and Marmoset.
Step 5: Expressions
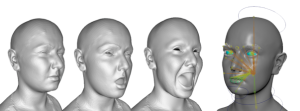
During the fifth step, we add expressions to the 3D model to make it appear more lifelike. This can be done by selecting the appropriate facial expressions and applying them to the model. The expressions need to be added to all 60 poses, allowing for us to animate the face, expressions are created from the photosets. Furthermore, a skeleton is added, so we are able to move the face. The final expressions are connected to the base, which was created in step 3.
Program used: Autodesk Maya

Step 6: Assets
Any additional assets that may be needed to complete the 3D model or environment are gathered. This can include things like additional 3D models, textures, and other elements (e.g., hair, eyes, and teeth). We are working on Deep Learning algorithms to automatically generate hair and teeth.
Programs used: Python, Cuda, and Autodesk Maya
Step 7: Unreal 4
Finally, we use Unreal 4 to bring the 3D model and environment to life. This can be done by importing the 3D model and assets into the game engine and using its tools and features to create a realistic and engaging experience.
Program used: Unreal Engine 4
